Getting Started with Loop: Onboarding Guide for New Accounts
We're so happy you're here! If you’re just getting started with Loop and want to learn the basics, this guide is for you. We will walk you through the basics of Loop's features and the requirements for setting up your account.
Want a live walkthrough of Loop's features?
Join our Onboarding Webinar!
We will guide you through each important aspect of your account, plus dedicated Q&A time is provided at the end of every webinar. Hope to see you there!
Let's get started!
Connecting your bank account to Loop
Before you can start exploring all the Loop has to offer, you'll need to connect your external bank account to Loop via your Connected Bank Accounts Settings page - it only takes a few moments.
Step-by-step instructions are available here:
How to connect your bank account to Loop

- If your account does not automatically verify, it means one of the following actions need to take place:
- If the email address you used to create your account with Loop is different from the email address you use with your connected bank account, you will need to proceed through an additional verification step. Please check the email address that is associated with your connected bank account for an email from Loop. This email will guide you through a one-click verification process.
- In some cases, additional verification measures may be required. If this is the case, you will receive an email from Loop with details on uploading your bank statement to your Loop account.
Adding Loop Cards
Whether you are using Loop's pre-funded card, or a card with a credit limit, your process for adding a new card is simple.
Loop offers two types of cards: virtual cards and physical cards.
Virtual Cards: best for online payments such as digital ads and recurring subscription fees. Creating virtual cards is free, and there are no limits on the amount of virtual cards you can make.
Physical Cards: best for taking your card into the real world. Your first two physical cards are included for free, any physical cards in excess of two are billed at $5/card.
Step-by-step instructions on setting up your first card are available here:
How to create a card

Note: Loop does not automatically send you a physical card when your account is registered. If you would like a physical card, simply add one through your account dashboard and it will be sent to you.
Additional Resources:
- Loop Card features and settings overview
- What is my billing cycle?
- How do I pay my Loop Card statement?
Adding your U.S. Bank Account
Access U.S. bank account details in one business day or less by setting up a U.S. bank account through Loop. This means you can receive payouts from marketplaces such as Amazon, Shopify, PayPal, Etsy and Stripe, as well as payments from any other customers in USD. Deposits in your U.S. bank account are FDIC insured.
Step-by-step instructions on setting up your U.S. bank account available here:
How do I set up my U.S. bank account?
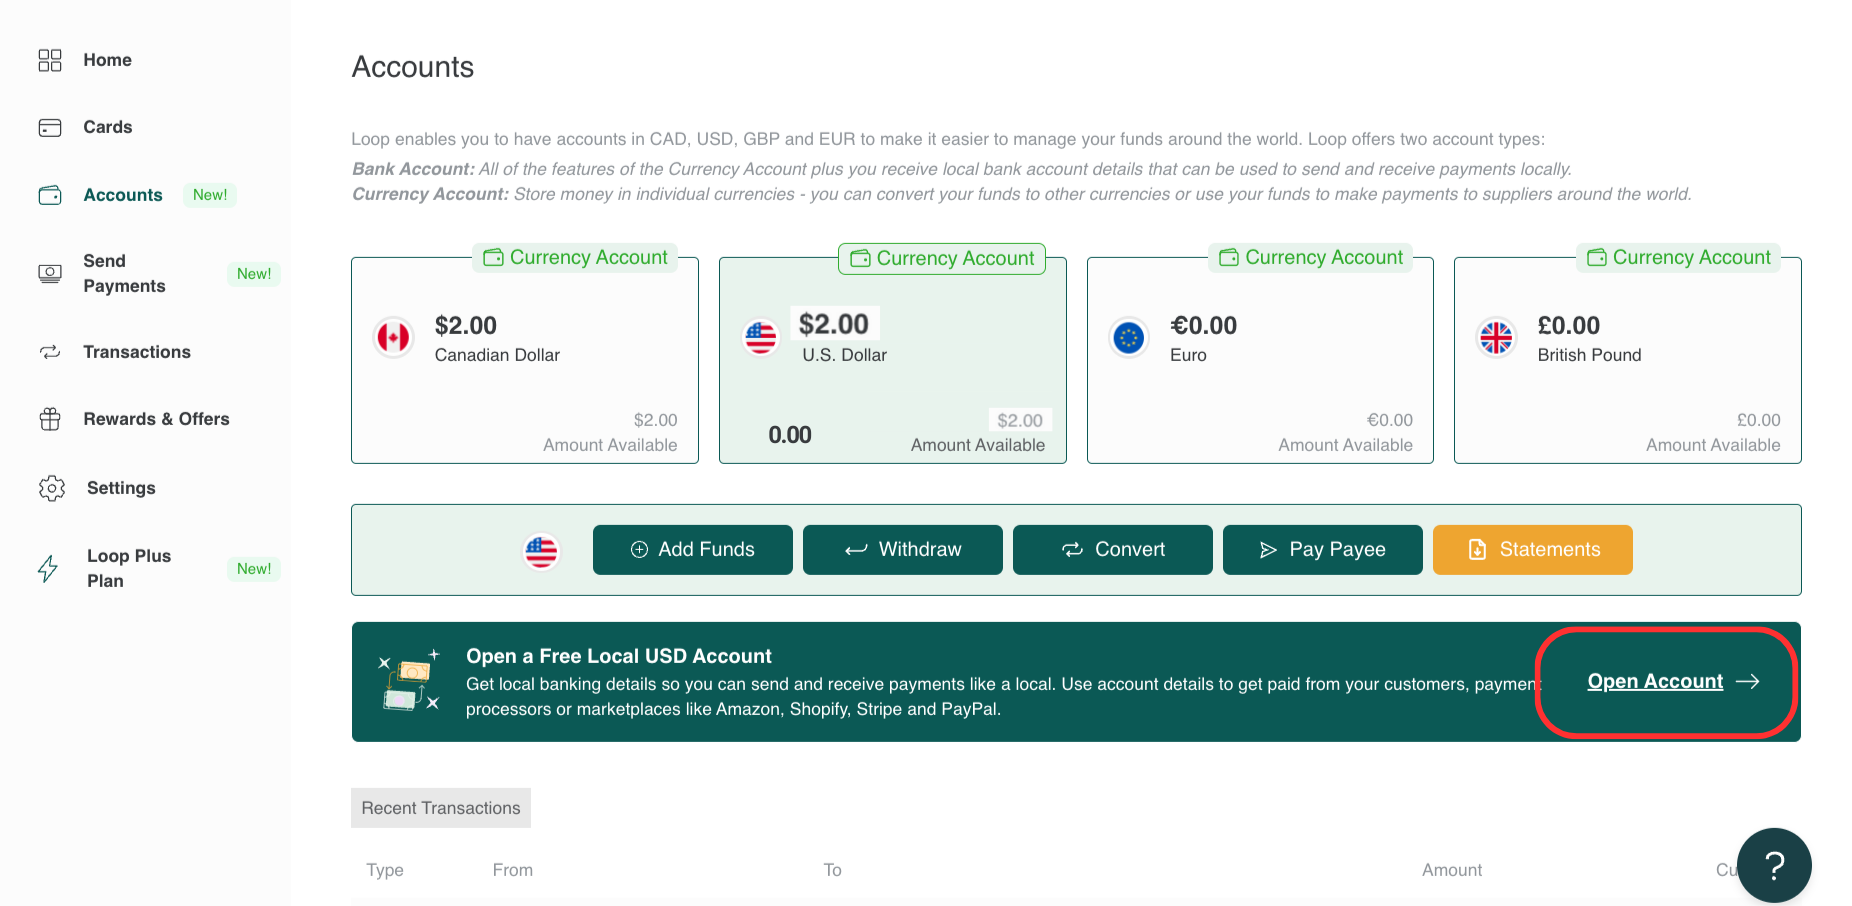
EUR and GBP bank accounts are created automatically when your account is registered. You can click on Get Account Details to view the information for these accounts.
Adding/Receiving Funds to Your Loop Account
There are two main ways to get funds from an external account or source into your Loop account:
- Add funds by transferring from your connected external bank account
How to add funds to your Loop account
- Receive funds into your Loop account from a sales channel, customer or external source
How to receive payments into your Loop account
Adding additional users to your account
The more, the merrier! Adding your team members to your Loop account is simple and allows you to assign new cards to team members, or share existing card details.
Step-by-step instructions on adding additional users to your account are available here:
How to add a new user to your account
Accessing customer support
There are two main ways you can get in touch with our support team:
- Email our support team at any time - support@bankonloop.com. Our office hours are 9-5, Mon-Fri.
- Send us a message via the “Contact Us” form on the bottom right corner of the dashboard.